 |
| Classic Fords came with a choice of rear ends depending on the year and package. A high performance 9", a mid-grade 8" and even a tiny 7". Our Mustang, like a lot of older rides. Had a tired worn out leaf spring setup, shackled to a old Ford 8" (yes 8") and busted drum brakes. This simply isn't going to work for our future power plant pans and lets face it drum brakes are antiquated pains when changing out the pads. To fix, we turned to Heidts for their bolt in coil over setup with a Ford 9" and disc brake package. |
 |
| To tell which rear end you have, there is a couple things. ford 7's & 8.8's bolt in from the rear and the the 8's & 9's bolt in from the front. Only the 8.8 and the 9" use a 3" axle tube to further determine which you have. Using a tape measure across the rear housing will also tell you the true size. First step is removing the old rear end. Start by placing a floor jack under the rear end housing to support it. Unbolt the front and rear shackles, holding the leaf springs in place. Remove the rear brake line junction, freeing the rear from the front and unbolt your shocks. Unbolt your e-brake cables and lower the jack slowly. If the spring are rust to the housing (like ours) applying a oxy acetylene torch should break the rust free or you can use a cutoff wheel to cut the springs free. |
 |
| You should be left with and empty rear and since our new setup remounts the shocks. We will remove those next. |
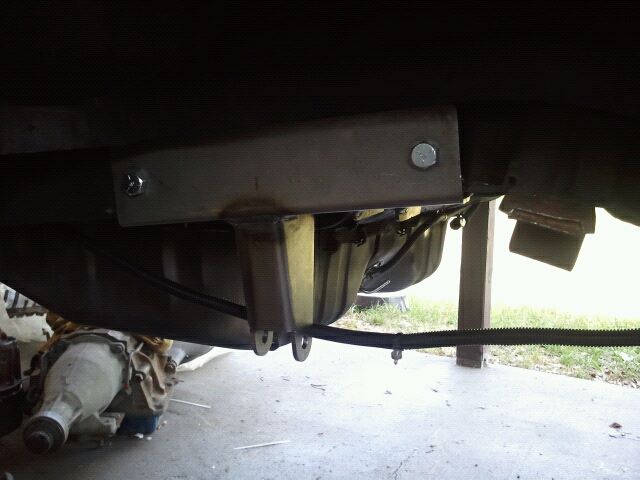
Using the instructions and the supplied brackets. We measure from the rear shackle mount made our marks using a metal marker and drilled our holes. This completes the rear mounting setup.
 |
| The front mounts in where the factory leaf springs bolted in. Two additional holes need to be made and then the front can be bolted down. Now we can start assembling the new rear end with brackets secured. |
 |
| Using the supplied hardware and coil over, the setup is quick and easily bolted in. The great part about this setup is that its completely adjustable. You can adjust the ride height, drive line angle, preload, axle center point and ride stiffness. |
 |
| After welding the brackets to the housing. Its now ready to be painted and bolted in. Side note this housing also is available with the brackets already welded on. |
 |
| Using the same technique as removal. Placing a jack under the rear end and lifting into place, made quick easy work of bolting it on. With the rear end housing installed, we put in our pan hard bar and tightened everything down to proper torque specs. |
 |
| For axles we're using Heidt's case hardened 31 spline axles with a 5 x 4.5 bolt pattern to fit our ford bolt pattern. |
 |
| We're using a disc brake setup with built it e-brake from The Right Stuff brake company. |
Too Be Continued....


No comments:
Post a Comment